Table of Contents
ToggleA plain shed sitting in someone’s backyard can transform into a fully functional tiny home, and more people are figuring this out every year. Sheds offer a blank slate with solid bones, lower upfront costs than traditional construction, and flexibility that stick-built structures can’t match. Whether someone’s looking to build an accessory dwelling unit (ADU), create rental income, or downsize their lifestyle, a shed conversion offers a practical path to tiny home ownership. This guide walks through the features, conversion process, legal requirements, and design options that turn a simple storage structure into livable square footage.
Key Takeaways
- Sheds for tiny homes offer 30–50% cost savings over traditional construction, with quality shed shells running $8,000–$15,000 compared to $20,000–$30,000 for ground-up building, freeing budget for insulation, electrical, and plumbing upgrades.
- Sheds must meet residential standards for habitability: upgrade floor joists to 2×6 or 2×8 on 16-inch centers, add egress windows and doors per IRC codes, and insulate to at least R-13 in walls and R-30 in ceilings.
- Converting a shed into a tiny home involves four phases—structural upgrades, electrical and HVAC installation, plumbing (or composting toilet systems), and interior finishes—budgeting $15,000–$40,000 beyond the shed shell.
- Permitting and zoning rules vary by jurisdiction; accessory dwelling units (ADUs) are the most common legal pathway, requiring building, electrical, and plumbing permits with inspections at rough-in and final stages.
- Mini-split heat pumps and vented propane heaters are ideal climate control solutions for shed tiny homes under 500 square feet, avoiding the need for ductwork in limited spaces.
- Space planning is critical in tiny homes; built-in furniture, Murphy beds, and floor-to-ceiling storage maximize usability in 120–400 square foot conversions.
Why Sheds Make Perfect Tiny Home Foundations
Sheds already have the structural framework most tiny homes need: four walls, a roof, and a solid floor system. That saves thousands in labor and materials compared to starting from scratch. Pre-built sheds from manufacturers often use 2×4 or 2×6 wall framing on 16-inch or 24-inch centers, which meets or exceeds IRC requirements for non-load-bearing partition walls in many jurisdictions.
The cost advantage is real. A quality 12×24-foot shed shell typically runs $8,000–$15,000 delivered, depending on materials and regional pricing. Building the same footprint from the ground up, including foundation, framing, sheathing, and roofing, pushes closer to $20,000–$30,000 before any interior work begins. That gap gives DIYers budget to invest in insulation, electrical, plumbing, and finishes that actually make the space livable.
Sheds are also modular and movable. Many designs sit on skids or treated runners rather than permanent foundations, which keeps them classified as accessory structures in some zoning codes. That can sidestep restrictions on additional dwellings while still creating rentable or occupiable space. If someone needs to relocate, a shed-based tiny home can often be lifted and transported intact, something mobile tiny homes capitalize on with trailers, but sheds achieve with heavy equipment and flatbed haulers.
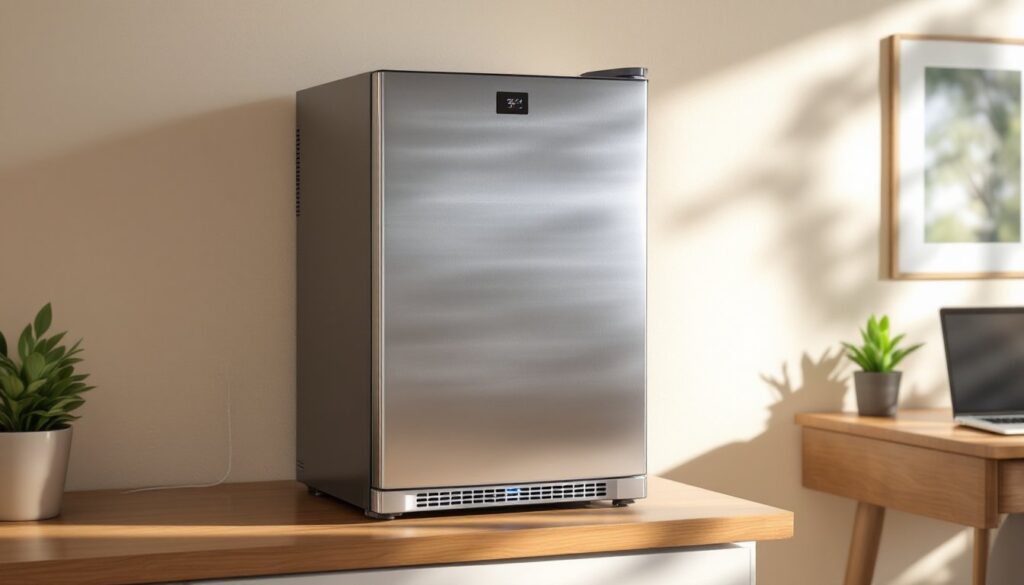
Key Features to Look for in a Tiny Home Shed
Not every shed works for habitation. Choosing the right base structure makes the difference between a straightforward conversion and a money pit.
Size and Layout Considerations
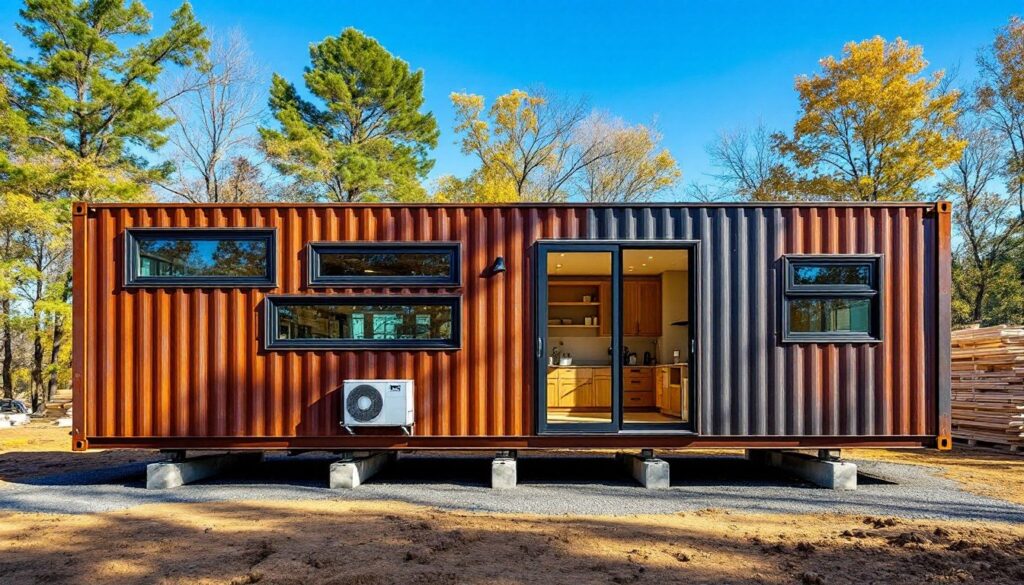
Minimum livable space varies by local code, but most tiny home dwellers find 120–400 square feet workable. A 10×12 shed (120 sq ft) suits a single sleeper or seasonal guest quarters, while a 16×24 (384 sq ft) accommodates a small kitchen, bathroom, sleeping loft, and living area. Always confirm ceiling height, standard sheds run 7–8 feet at the eave, which feels cramped once ceiling finishes and utilities are added. Look for models with taller sidewalls (8–10 feet) or lofted designs that allow sleeping areas above the main floor without bumping heads.
Floor joist spacing and capacity matter more than most buyers realize. Residential floors need to support 40 pounds per square foot (psf) live load per IRC standards. Sheds often use lighter floor systems (2×4 joists on 24-inch centers with 3/4-inch OSB), suitable for storage but marginal for full-time occupancy with furniture, appliances, and people. Upgrade to 2×6 or 2×8 joists on 16-inch centers with 3/4-inch T&G plywood for a floor that won’t sag or squeak. Some shed manufacturers offer “cabin-grade” or “tiny home ready” models with beefier framing, worth the upcharge.
Door and window placement affects both function and permitting. Egress codes require one egress door and one egress window (minimum 5.7 sq ft opening, 24-inch height, 20-inch width) in sleeping rooms. Plan shed layout so the main entry meets egress width (typically 32 inches clear), and add windows before walls are closed up. Retrofitting openings into a finished shed means cutting structural members and adding headers.
Insulation and Climate Control
Sheds ship with minimal or zero insulation. Walls are typically bare studs with exterior siding and interior paneling, leaving a 3.5-inch cavity that bleeds heat in winter and bakes in summer. Insulating to at least R-13 in walls and R-30 in the ceiling brings the space to basic residential comfort. Fiberglass batts are budget-friendly and DIY-friendly: closed-cell spray foam costs more but adds structural rigidity and vapor barrier in one pass, helpful in humid climates.
Vapor barriers prevent condensation inside wall cavities, which leads to mold and rot. In cold climates, install 6-mil poly sheeting on the warm (interior) side of the insulation. In hot, humid regions, some builders skip interior vapor barriers to allow drying to the inside, consult local building science resources or an HVAC professional if unsure.
Heating and cooling a tiny shed home is straightforward with the right equipment. Mini-split heat pumps (ductless) handle both functions efficiently in spaces under 500 sq ft, typically drawing 500–1,500 watts. A 9,000–12,000 BTU unit covers most single-room layouts. For off-grid or backup heat, vented propane heaters (like Monitor or Dickinson models) work well but require proper combustion air and flue venting per manufacturer specs and local codes. Never use unvented portable heaters as primary heat, carbon monoxide and moisture buildup are real risks.
Many custom tiny homes incorporate passive ventilation strategies, like ridge vents and soffit vents, to prevent condensation and improve air quality.
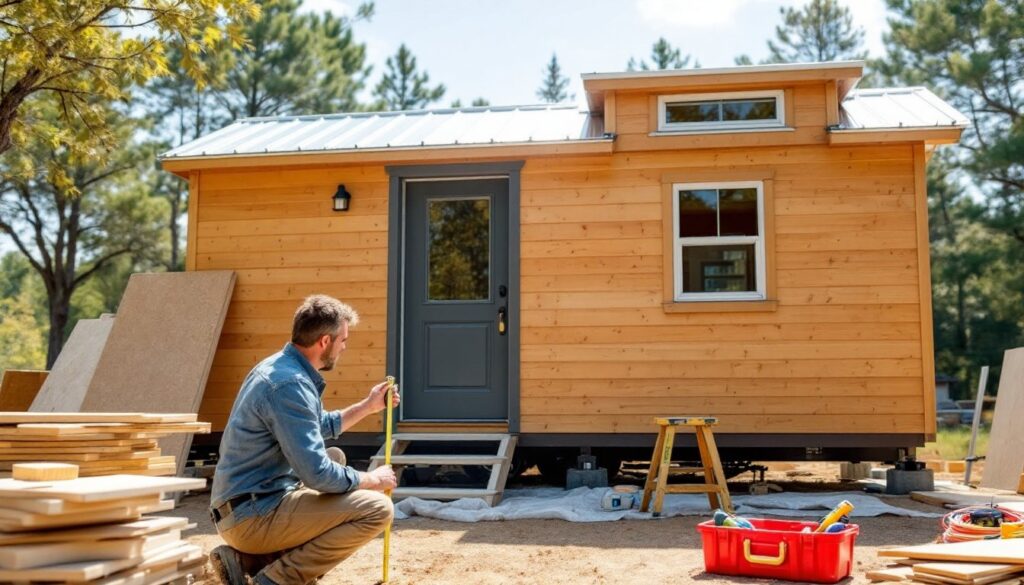
Converting Your Shed Into a Livable Tiny Home
Conversion work breaks into four main phases: structural upgrades, mechanical systems, interior finishes, and final inspections. Budget about $15,000–$40,000 in materials and labor beyond the shed shell, depending on finishes and whether plumbing is included.
Phase 1: Structural and envelope work. Reinforce the floor if needed (see joist sizing above). Add or relocate windows and doors to meet egress and natural light requirements, IRC calls for 8% of floor area in glazing and 4% operable for ventilation. Install exterior housewrap or building paper if the shed didn’t include it, then add insulation and interior vapor barrier. This is the time to run any in-wall plumbing (PEX is easiest for DIYers) and electrical rough-in.
Phase 2: Electrical and HVAC. Tiny homes typically need a 100-amp or 125-amp service panel if grid-connected, though off-grid solar setups often run on 50-amp or smaller panels. Hire a licensed electrician unless the builder holds appropriate permits, NEC compliance and inspection are non-negotiable for safety and insurance. Plan circuits for heating/cooling (dedicated 20-amp for mini-split), kitchen (two 20-amp small appliance circuits), bathroom (one 20-amp GFCI), and general lighting/receptacles (15-amp). GFCI and AFCI protection are required in kitchens, bathrooms, and sleeping areas per current NEC.
Install the mini-split or heater, routing refrigerant lines and condensate drains per manufacturer instructions. If installing a vented heater or wood stove, follow clearances to combustibles and use proper class A chimney or direct-vent pipe.
Phase 3: Plumbing (if applicable). Many shed tiny homes use composting toilets (Nature’s Head, Separett) to avoid black water and septic hookups, paired with a small gray water system for sinks and showers. If connecting to municipal sewer or septic, install PEX supply lines (3/4-inch main, 1/2-inch branches) and ABS or PVC drainpipe (3-inch for toilet, 2-inch for shower, 1.5-inch for sinks) with proper venting per IPC. A tankless electric or propane water heater (2-4 GPM) fits tight spaces and provides endless hot water for one or two people. Insulate all supply pipes in exterior walls or unheated crawlspaces to prevent freezing.
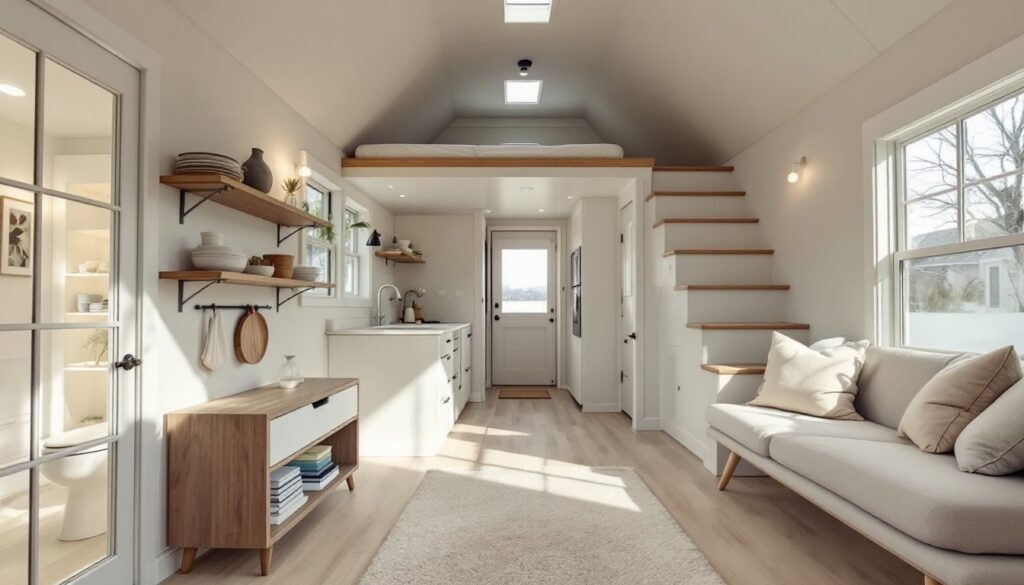
Phase 4: Interior finishes. Drywall (1/2-inch) is code-standard, but many tiny home builders use tongue-and-groove pine or plywood paneling for faster install and a warmer aesthetic. Paint or seal raw wood with low-VOC finishes, ventilation is limited in small spaces. Install underlayment and finish flooring (luxury vinyl plank is durable and water-resistant: engineered hardwood adds warmth). Build or install kitchen cabinets, countertops (butcher block, laminate, or quartz), and bathroom fixtures. Keep plumbing and electrical accessible for future service.
Space planning is critical in under 300 sq ft. Built-in furniture, Murphy beds, fold-down tables, and floor-to-ceiling storage, maximizes usable area. Resources like Apartment Therapy offer countless small-space layout ideas. For families considering tiny living, adaptable layouts for tiny homes for families balance privacy and shared space.
Permits, Zoning, and Legal Requirements for Shed-Based Tiny Homes
Zoning and permitting rules vary widely by jurisdiction, what’s allowed in rural Texas may be prohibited in suburban California. Research local codes before buying a shed or starting work: retrofitting after a stop-work order is expensive and demoralizing.
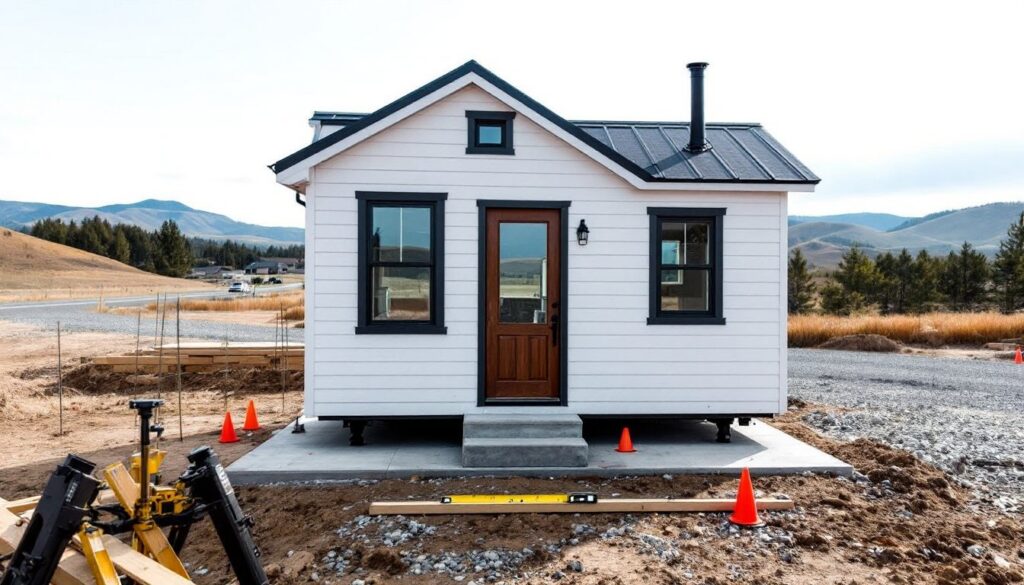
Accessory Dwelling Units (ADUs) are the most common legal pathway. Many municipalities amended zoning in recent years to allow ADUs on single-family lots, often with size caps (400–800 sq ft), setback requirements, and owner-occupancy rules. Converting a shed into an ADU typically requires a building permit, electrical permit, and plumbing permit, plus inspections at rough-in and final stages. Some areas allow sheds under a certain size (often 120–200 sq ft) to remain unpermitted if used for storage, but adding plumbing or habitation triggers permit requirements.
Foundation type affects classification. Sheds on skids or blocks may qualify as temporary structures in some zones, avoiding property tax increases or permanent dwelling restrictions. Pouring a concrete slab or pier foundation makes the structure permanent and subject to setback, lot coverage, and building code compliance. If planning to move the tiny home later, keep it on skids and check local regulations on relocating structures.
Occupancy and safety codes apply once a shed becomes habitable. Expect inspections for:
- Egress: Doors and windows meeting size/operation requirements
- Electrical: NEC-compliant wiring, GFCI/AFCI protection, proper panel and grounding
- Plumbing: Venting, trap installation, water heater T&P valve discharge, backflow prevention
- Structural: Floor, wall, and roof loads: proper fastening and bracing
- Energy: Insulation minimums (varies by climate zone)
Some jurisdictions require engineered drawings or architect-stamped plans for any habitable structure: others accept owner-builder plans for small ADUs. Contact the local building department early, inspectors can clarify requirements and often suggest the smoothest path to approval.
Homeowners insurance may not cover unpermitted conversions or non-code-compliant work. Disclose any modifications to the insurer and obtain riders or separate policies if the shed will be rented or occupied by non-family members. Financing is tricky too, conventional mortgages rarely apply to sheds, though personal loans, home equity lines, or ADU-specific products might.
For those pursuing shed tiny homes within existing tiny home communities, community rules and covenants often streamline permitting or offer pre-approved shed models.
Top Shed Styles and Designs for Tiny Home Projects
Shed design affects both aesthetics and function. Choose a style that fits the intended use, climate, and available lot space.
Gable sheds feature a traditional peaked roof with a ridge running the length of the building. They offer the most attic or loft space, ideal for sleeping areas in tiny homes, and shed rain and snow effectively. Standard gable pitches (4/12 to 6/12) allow standing height in lofts without excessive exterior height. Gable ends are easy to vent with gable vents or louvers, improving airflow and preventing moisture buildup.
Gambrel (barn-style) sheds maximize interior volume with a two-slope roof (steep lower, shallow upper). They provide more headroom in lofts than gables of the same footprint, but the complex roof framing increases cost. Gambrels suit tiny homes where every cubic foot counts, especially in width-restricted lots.
Saltbox and lean-to designs feature asymmetrical rooflines, one long slope, one short. These work well on sloped sites or where zoning limits building height on one side. The shorter wall can face a property line, keeping the structure within setbacks while the taller side accommodates windows and loft access.
Modern shed-roof (single-slope) designs angle one direction, often with glazing on the high side for natural light and a contemporary look. Shed roofs simplify construction (no ridge beam) and perform well in moderate climates, but they concentrate snow and rain loads on the low eave, ensure gutters and drainage are robust.
Cabin-grade sheds come pre-wired or pre-plumbed from some manufacturers, saving substantial DIY labor. These models typically include upgraded floor joists, insulated walls, double-pane windows, and a service-ready electrical panel. They cost 30–50% more than basic sheds but cut conversion time by weeks. Brands like Tuff Shed, Graceland Portable Buildings, and Shed-in-a-Day offer tiny-home-ready models: always verify local delivery and setup availability.
Aesthetic upgrades make a shed feel less utilitarian: board-and-batten or vertical siding, metal roofing in standing-seam or corrugated profiles, wide trim and shutters, and a covered porch or overhang. Porches add usable outdoor space (critical in tiny living) and protect entries from weather. A 4×8-foot covered porch costs $500–$1,500 in materials but extends livability significantly.
For style inspiration and small-space strategies, resources like The Handyman’s Daughter and Family Handyman provide step-by-step tutorials on trim work, siding installation, and custom built-ins that elevate a shed conversion. Understanding the financial side beforehand, through a tiny home cost breakdown, helps avoid budget surprises mid-project.
In urban tiny homes, sleek modern shed designs often blend better with city aesthetics and zoning boards’ expectations than rustic barn styles.
Converting a shed into a tiny home isn’t a weekend project, but it’s achievable for a motivated DIYer with basic carpentry and mechanical skills. Focus on solid structure, code-compliant systems, and efficient space planning, the rest is finish work. With the right shed, realistic expectations, and attention to local regulations, it’s possible to create a comfortable, legal, and surprisingly affordable living space.