Table of Contents
ToggleTiny homes don’t have to feel cramped. With the right design choices, a 200-square-foot space can feel as open as a studio twice its size. The difference between claustrophobic and comfortable comes down to intentional planning, from framing decisions to furniture placement to how light moves through the room. This isn’t about lifestyle minimalism or decluttering mantras. It’s about structural and design techniques that trick the eye, maximize function, and give occupants breathing room in tight quarters.
Key Takeaways
- Spacious tiny homes rely on ceiling height, natural light, and open floor plans rather than square footage alone—a 10-foot ceiling in 150 square feet feels roomier than an 8-foot ceiling in 200 square feet.
- Strategic design techniques like mirrors, consistent flooring, vertical lines, and low-profile furniture create visual expansion by maintaining unobstructed sightlines and reflecting light throughout the space.
- Multi-functional furniture and built-in storage—such as Murphy beds, lift-top tables, and stairs with drawers—eliminate redundancy and free floor space while reducing visual clutter.
- Smart floor plans maximize every square foot by consolidating plumbing on wet walls, using galley kitchens, and positioning lofts over bathrooms or kitchens rather than living areas.
- Light colors, satin finishes, and translucent materials like frosted glass maintain brightness and openness while defining zones without blocking sightlines in spacious tiny homes.
- Professional tiny home builders achieve spacious designs for $65,000–$90,000, while DIY approaches can cost $25,000–$45,000 in materials when applying these same proven principles.
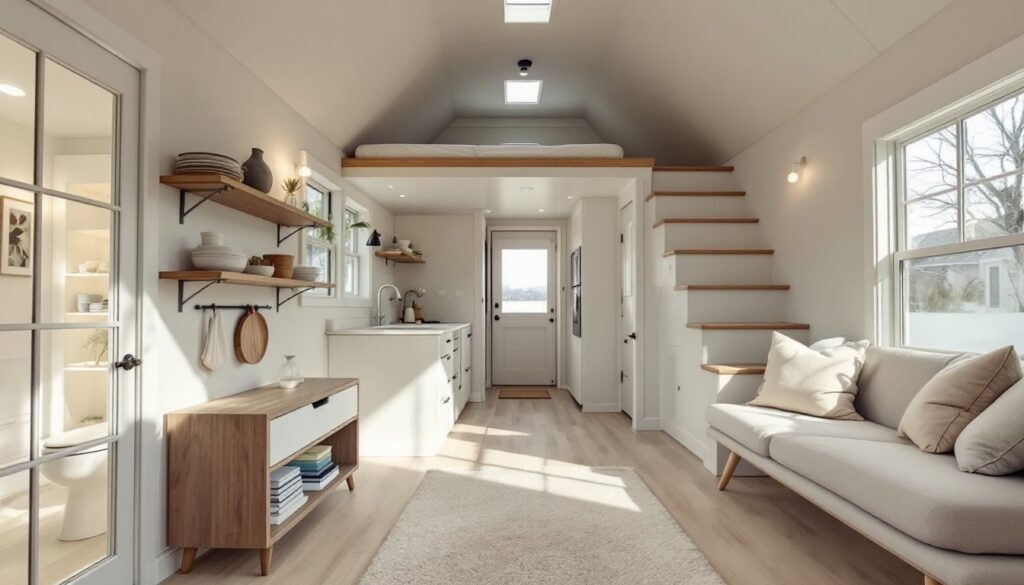
What Makes a Tiny Home Feel Spacious?
Perceived spaciousness is the result of visual continuity, natural light, ceiling height, and traffic flow. A tiny home that feels open uses proportional furniture, avoids visual clutter, and keeps sightlines unobstructed.
Ceiling height matters more than square footage in many cases. A 10-foot ceiling in a 150-square-foot space feels roomier than an 8-foot ceiling in 200 square feet. Loft designs capitalize on vertical space, but be mindful of IRC minimum headroom requirements: habitable rooms need 7 feet clearance, and hallways require 6 feet 8 inches. Some tiny homes use cathedral or shed-style roofs to add perceived volume without increasing footprint.
Open floor plans eliminate unnecessary walls. Combining kitchen, dining, and living areas into one zone creates visual expansion. But, this approach requires smart furniture arrangement to define zones without physical barriers. Area rugs, lighting shifts, and half-height partitions can suggest boundaries without blocking sightlines.
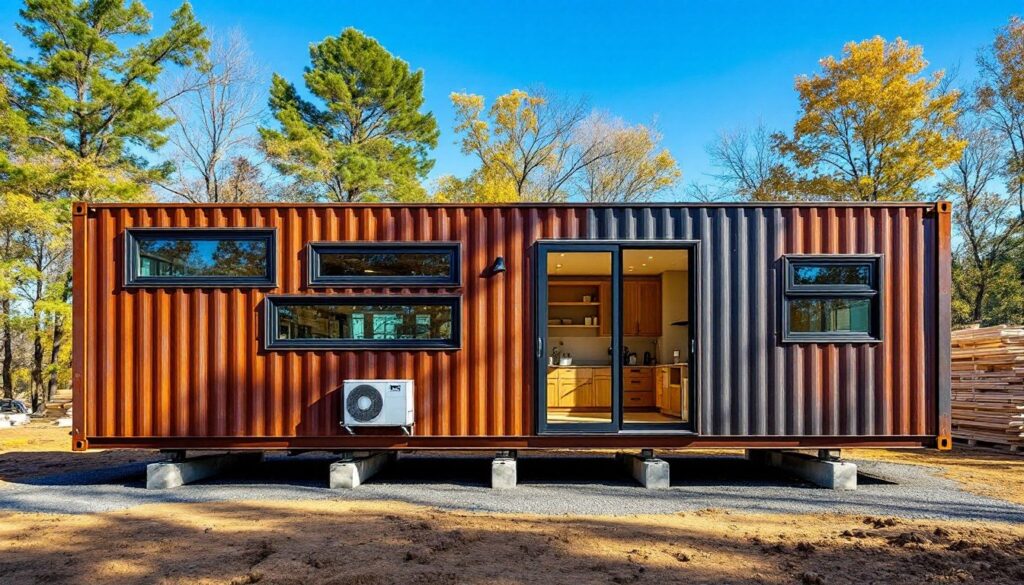
Natural light amplifies the effect. South-facing windows maximize daylight, but avoid placing windows where they compromise wall space needed for storage or furniture. Skylights add overhead light without sacrificing privacy, especially in urban tiny homes where neighbors are close. Clerestory windows, narrow strips near the roofline, bring in light while maintaining wall utility below.
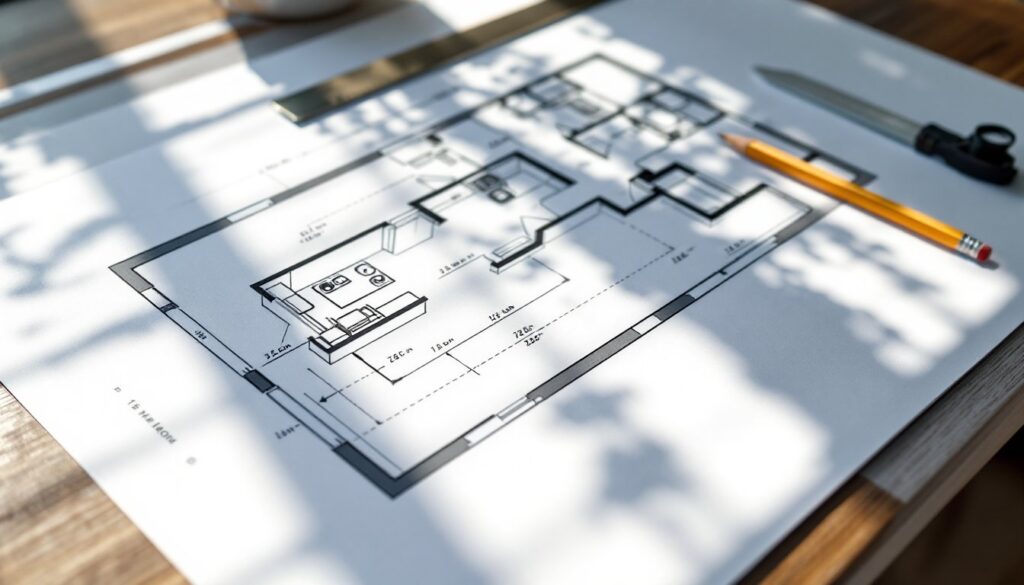
Smart Floor Plans That Maximize Every Square Foot
Efficient floor plans eliminate wasted circulation space. Every square foot should serve a purpose, either as usable living area or essential clearance.
Galley kitchens work well in narrow footprints. A 3-foot-wide corridor between counters meets code and allows one person to work comfortably. Use shallow upper cabinets (12 inches deep instead of 15 inches) on one side to prevent the space from feeling tight. Corner spaces benefit from lazy Susans or pull-out organizers rather than dead storage.
Wet walls consolidate plumbing. Stacking the kitchen sink, bathroom sink, and shower along one interior wall reduces material costs and simplifies hookups. This approach is especially critical in mobile tiny homes where weight distribution and plumbing flexibility matter during transport.
Bathroom layouts deserve careful planning. A 3×5-foot bathroom can fit a corner shower (32×32 inches), wall-hung toilet, and pedestal sink. Pocket doors save 10-12 inches compared to swing doors. Consider a wet bath design, common in RVs, where the entire bathroom is waterproofed and the shower drains from the floor. It’s unconventional but eliminates the need for a separate shower enclosure.
Loft positioning affects usability. Place sleeping lofts over bathrooms or kitchens where lower headroom is acceptable. Avoid positioning lofts over the main living area if possible, as it lowers the ceiling and compresses the space visually. Stair access beats ladders for daily use, but stairs consume 25-30 square feet. Alternating-tread stairs (sometimes called ship’s ladders) use half that space and meet IRC if designed correctly.
Multi-Functional Furniture and Built-In Storage Solutions
Multi-functional furniture eliminates redundancy. One well-designed piece replaces three single-purpose items, freeing floor space and reducing visual clutter.
Murphy beds fold into the wall, converting a bedroom into a living room in seconds. Modern versions include integrated shelving or desks. Ensure the wall framing can support the weight, most Murphy bed kits specify attachment to studs with lag bolts, not drywall anchors. If building new, frame the wall with 2×6 studs instead of 2×4 to accommodate the recessed cabinet depth without compromising insulation.
Lift-top coffee tables reveal storage underneath and raise to dining height. They’re practical for homes without dedicated dining tables. Look for models with pneumatic lifts rated for at least 50 pounds to handle the mechanism’s daily use.
Bench seating with storage works along walls or under windows. Build with ¾-inch plywood for the box and add piano hinges for the lid. Include a soft-close mechanism to prevent slamming. Standard bench depth is 18-20 inches, which also works as extra sleeping space when topped with a cushion.
Built-in storage beats freestanding furniture for space efficiency. Floor-to-ceiling shelving uses vertical space often wasted above cabinets. Build shelves 12 inches deep for books and decor, 16 inches deep for kitchen pantry items. Use ¾-inch plywood with edge banding for shelves spanning more than 30 inches to prevent sagging.
Stairs with built-in drawers, each step becomes a pull-out compartment, are popular in custom tiny homes but require precision carpentry. Each drawer needs full-extension slides rated for at least 100 pounds, and the stair tread must remain code-compliant (10-inch minimum depth). This is advanced work: hire a finish carpenter if you’re not confident in your skills.
Design Tricks to Create Visual Spaciousness
Design choices influence how large a space feels, even when dimensions stay the same. These techniques rely on optical effects and material choices.
Mirrors reflect light and double perceived depth. A full-height mirror on one wall can make a 10-foot room feel 20 feet wide. Place mirrors opposite windows to bounce natural light deeper into the space. Avoid mirrored ceilings, they’re disorienting and dated.
Consistent flooring throughout the home eliminates visual breaks. Transition strips between rooms chop up the space and make it feel smaller. Use the same flooring material from entry to bedroom. Luxury vinyl plank (LVP) works well in tiny homes: it’s durable, moisture-resistant, and typically 5-7mm thick, so it doesn’t add much height at doorways.
Low-profile furniture keeps sightlines open. Sofas with exposed legs (6-8 inches of clearance) feel lighter than skirted models that sit flush to the floor. Glass or acrylic coffee tables disappear visually, and experts at Apartment Therapy often recommend transparent furniture for small spaces to maintain visual flow.
Vertical lines draw the eye upward, making ceilings feel higher. Shiplap installed vertically, floor-to-ceiling bookcases, or even striped wallpaper can create this effect. Conversely, horizontal lines (like wainscoting or chair rails) can make a space feel wider but lower.
Light, Color, and Materials
Light colors reflect more light than dark ones, making spaces feel larger. White or pale gray walls are safe bets, but avoid stark white in small spaces, it can feel clinical. Off-whites with warm undertones (think cream or ivory) add warmth without closing in the space. Paint ceilings the same color as walls, or go one shade lighter. Contrasting ceiling colors create a visual boundary that lowers perceived height.
Gloss level affects light reflection. Satin or semi-gloss finishes reflect more light than flat paint, but they also highlight wall imperfections. In new construction, semi-gloss works well. In older builds with wavy drywall, stick with eggshell to hide flaws.
Natural materials add texture without heaviness. Light-toned woods like maple, birch, or ash keep spaces bright. If using reclaimed barn wood, popular in tiny homes, consider whitewashing or liming it to lighten the tone. Dark walnut or cherry can work as accent walls, but use sparingly.
Translucent materials separate spaces without blocking light. Frosted glass, polycarbonate panels, or even sheer curtains can define a bedroom area while maintaining openness. Pocket doors with frosted glass inserts work well for bathrooms, providing privacy without the bulk of a solid door.
Real Examples of Spacious Tiny Home Designs
Seeing these principles in action clarifies how design choices compound to create spaciousness.
The Lookout by Tiny House Chattanooga uses a 10-foot ceiling in the main living area with a cathedral roofline. The kitchen features open shelving instead of upper cabinets, preventing visual weight. A wall of south-facing windows floods the space with light, and the white oak flooring runs continuously from entry to loft stairs. The bathroom uses a 32×32-inch corner shower with clear glass panels instead of a curtain, making the 3×6-foot bathroom feel larger.
The Indi by B&B Micro Manufacturing incorporates a main-floor bedroom instead of a loft, making it accessible for families or those with mobility concerns. This approach requires a smaller living area but eliminates the closed-in loft feel. Clever tiny home accessibility design can make spaces work for broader audiences. The kitchen uses a galley layout with one wall of 12-inch-deep shelving to maintain a sense of openness.
The Waterhaus by Greenpod Development targets tiny homes for families with a split-loft design, two separate sleeping areas for parents and kids. Floor-to-ceiling windows on both gable ends create cross-ventilation and visual connection to the outdoors. The living area uses built-in seating with storage underneath instead of a couch, saving 2 feet of floor space.
Budget considerations: These professionally built models typically run $65,000-$90,000 depending on finishes and location. DIY builders can achieve similar designs for less, expect $25,000-$45,000 in materials for a comparable build, though this varies widely with lumber prices and appliance choices. For a detailed breakdown, check out resources on tiny home cost to plan your budget realistically.
Conclusion
Spacious tiny homes aren’t accidents, they’re the result of deliberate design choices. Maximize ceiling height, eliminate visual clutter, use multi-functional furniture, and let natural light do the heavy lifting. Whether building from scratch or renovating an existing tiny home, these principles apply universally. Measure twice, plan carefully, and don’t skip the details that make small spaces livable.